Learning how to fix broken screen protector issues can save you money, a bit of frustration, and an unnecessary trip to the phone shop. A protector full of bubbles, peeling at the corners, or cracked across the middle is annoying to look at and even worse to scroll through every day. The good news is that most of these problems take only a few minutes to sort out at home, and you rarely need any special tools to do it.
This guide walks you through the most common screen protector problems and exactly how to fix each one. You will learn when a quick repair is worth your time, when you are better off replacing the protector, and how to put a fresh one on without a single bubble. By the end, you will know how to fix broken screen protector problems like you have done it a hundred times.
Table of Contents
First, can you actually fix a broken screen protector?
Here is the honest answer. It depends on the kind of damage you are dealing with. Small issues like air bubbles, trapped dust, and lifted edges are genuinely fixable, and we will cover all of them below. A protector that is deeply cracked or shattered is a different story. At that point the protector has already done its main job by taking the hit instead of your actual screen, and the smart move is to replace it.
There is a quick test to help you decide. If the glass underneath is perfectly fine and only the protector looks rough, you are in good shape. Run your fingernail gently across the damage. If it catches on cracks or sharp edges, that protector is near the end of its life. If the surface feels smooth and the only problem is bubbles or a peeling corner, you can fix it in minutes.
How to fix broken screen protector problems: the common issues
When you are working out how to fix broken screen protector damage, almost every issue falls into one of four buckets. Work through whichever one matches your situation, and skip the rest.
Fixing air bubbles under your screen protector
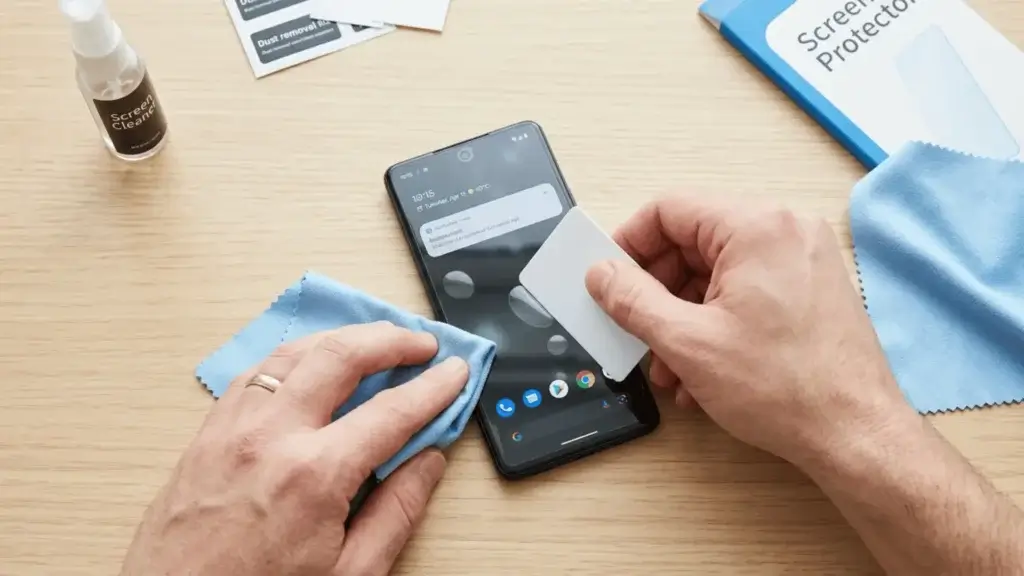
Air bubbles are the number one complaint, and luckily they are usually the easiest to fix. For small bubbles, grab a microfiber cloth or a stiff plastic card like an old gift card. Lay the cloth over the screen and push firmly from the center of the bubble outward toward the nearest edge. The trapped air will slide out the side and disappear.
For a stubborn bubble that sits in the middle, gently lift the closest edge of the protector just enough to let the air escape, then smooth it back down with the card. If a bubble has a tiny speck inside it, that is not air at all, which leads us straight to the next problem.
Getting rid of dust and lint
If a bubble refuses to budge no matter how hard you push, there is almost certainly a piece of dust trapped underneath. Pushing harder will only scratch things, so do not force it. Instead, carefully peel the protector back from the corner nearest the speck. Use a small piece of clear tape to lift the dust off the sticky side, then dab the screen itself clean with the tape too.
Now lay the protector back down slowly, letting it fall flat from one side to the other so you do not trap fresh air on the way. If you can, do this in a steamy bathroom right after a hot shower. The humidity pulls dust out of the air, and that is the same trick the professionals use.
Fixing lifted or peeling edges
Edges that lift and snag on your pocket are common, especially on phones with curved screens. First, clean both the edge of the screen and the underside of the protector with a tiny amount of rubbing alcohol on a cloth, then let everything dry completely. Most of the time the lifting is caused by skin oil or lint quietly breaking the seal.
Once it is clean and dry, press the edge down and hold it in place for a full thirty seconds so the adhesive can grab again. If it still refuses to stay down, the glue has probably worn out, and a replacement will serve you far better than another round of pressing.
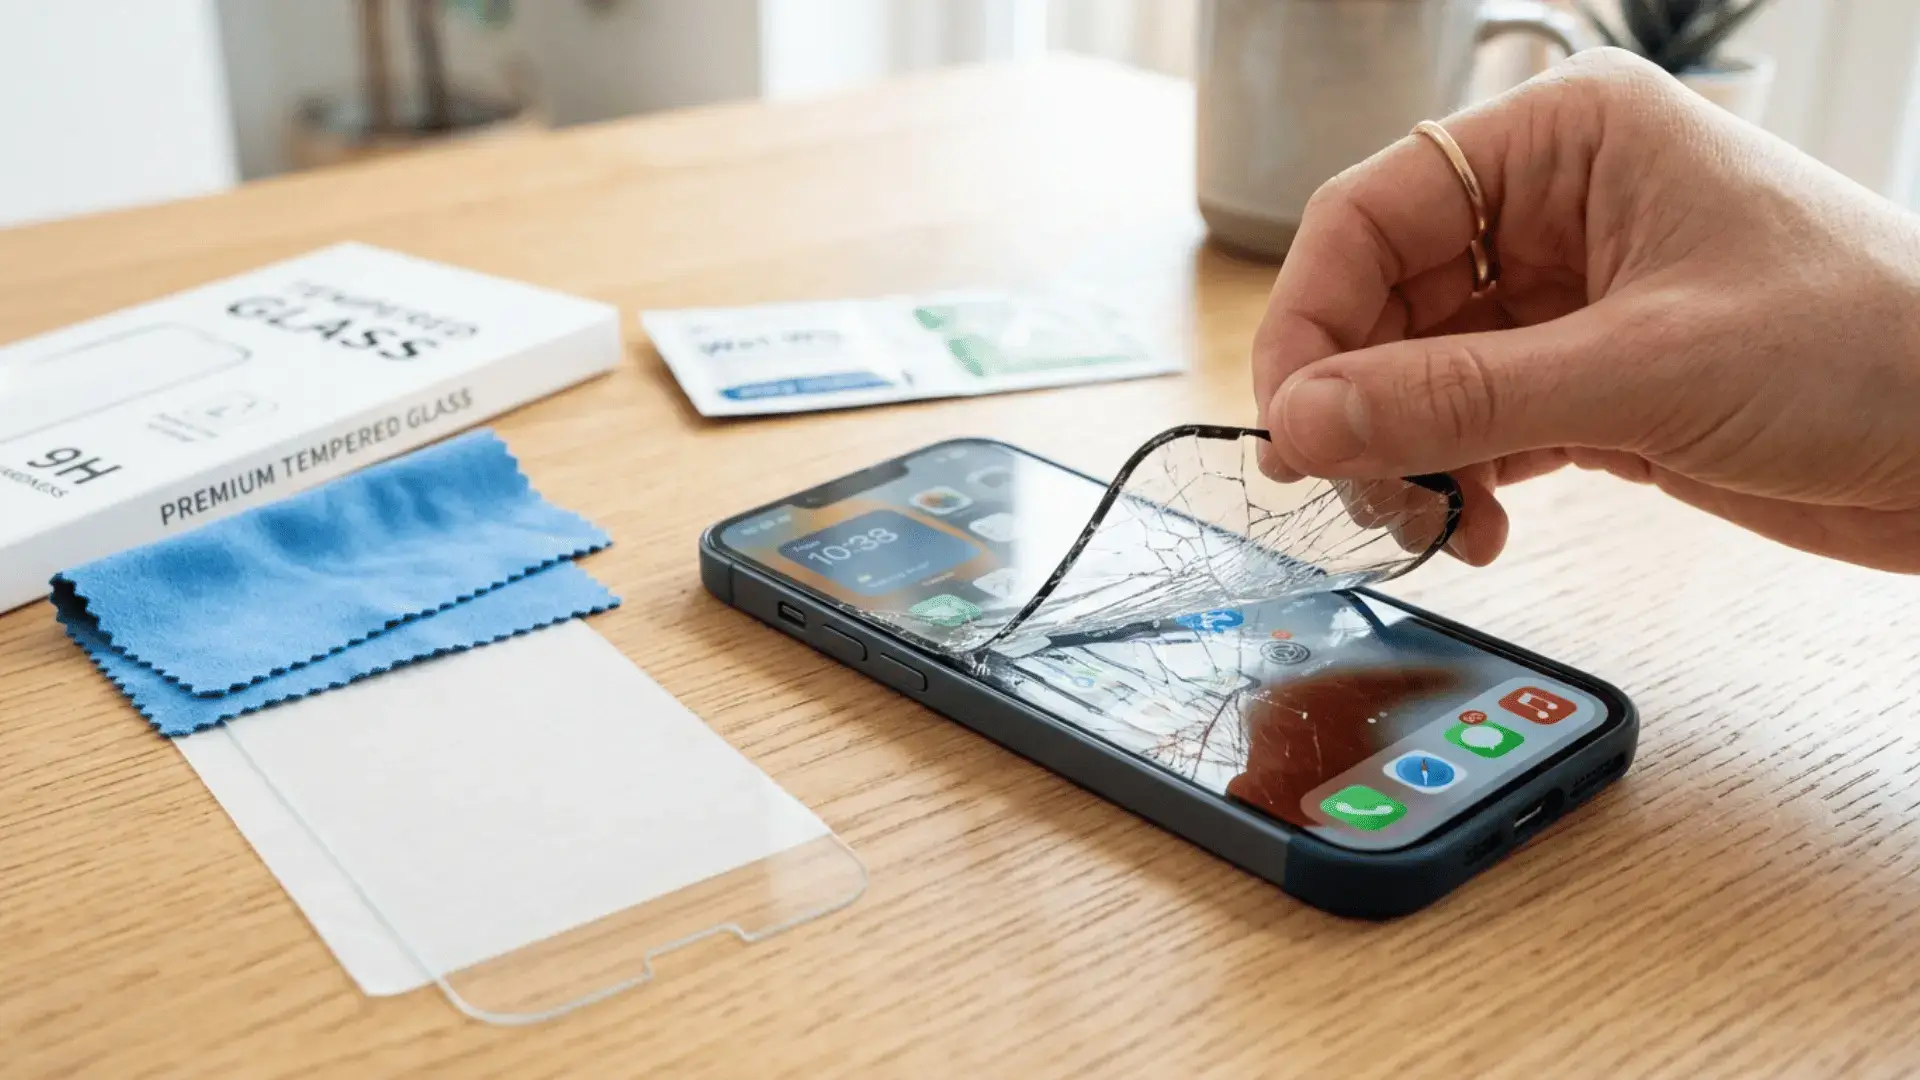
Dealing with cracks and chips
A cracked protector is actually good news in disguise, because it means the protector absorbed an impact that would otherwise have hit your screen. You cannot truly repair a crack, but you can make a damaged protector safe to use until the replacement arrives. Cover any sharp cracked edges with a thin strip of clear tape so they do not catch your finger, and avoid pressing on the cracked area. Then order a new one soon, because a cracked protector offers very little defense against the next drop. For a deeper look at phone repairs of all kinds, the teardown experts at iFixit are a great resource.
When to replace instead of fix a broken screen protector
Knowing how to fix broken screen protector damage also means knowing when not to. Sometimes the smartest move is a fresh start, so replace the protector rather than fixing it when any of these are true:
- The glass is cracked, shattered, or chipped
- The edges keep lifting even after a proper clean
- The surface is full of deep scratches that catch your nail
- Touch sensitivity has dropped or the screen misreads your taps
Replacing is cheap and quick. A quality tempered glass protector costs only a few dollars, and a clean new one feels far nicer than fighting with a damaged one every single day.
How to apply a new screen protector without bubbles
Once you decide to replace it, putting the new one on cleanly is half the battle. Here is the routine that works almost every time.
- Clean the screen with the alcohol wipe, then the microfiber cloth, then the included dust removal sticker.
- Work in a low dust room, ideally just after a hot shower has settled the air.
- Line the protector up carefully before it ever touches the glass, using the camera cutout as your guide.
- Lower one edge first, then let the rest fall flat on its own instead of slapping it down all at once.
- Push any small bubbles out toward the edges with your card.
Take your time on step three. Ninety percent of bad installs come from rushing the alignment, not from the protector itself.
Tips to keep your screen protector from breaking again
A few small habits make your next protector last far longer.
- Choose tempered glass over thin plastic film, since it resists cracks much better.
- Keep your phone in a case with a slightly raised lip around the screen.
- Never share a pocket with keys or coins.
- Wipe the screen often so grit does not grind into the surface.
- Replace the protector at the first sign of deep cracks instead of waiting.
Final thoughts
Now that you know how to fix broken screen protector problems, most everyday issues like bubbles, dust, and lifted edges become a five minute job rather than a reason to panic. Save the full replacement for the serious stuff like cracks and worn out adhesive, and apply each new protector slowly in a clean room to keep bubbles away for good. Treat the protector as the cheap, replaceable shield it was always meant to be, and the screen underneath will stay flawless for years.
While you are giving your phone a little care, it is a great moment to speed up your Android phone and clear out whatever is slowing it down. And if your handset has truly seen better days, our guide to the best Android phones under 200 can help you find a solid upgrade without overspending.